Learn How to Make a Perfect Cheese Platter - with these simple tips, you will have a delicious cheese board appetizer that's perfect for parties, holiday gatherings, or other social events.
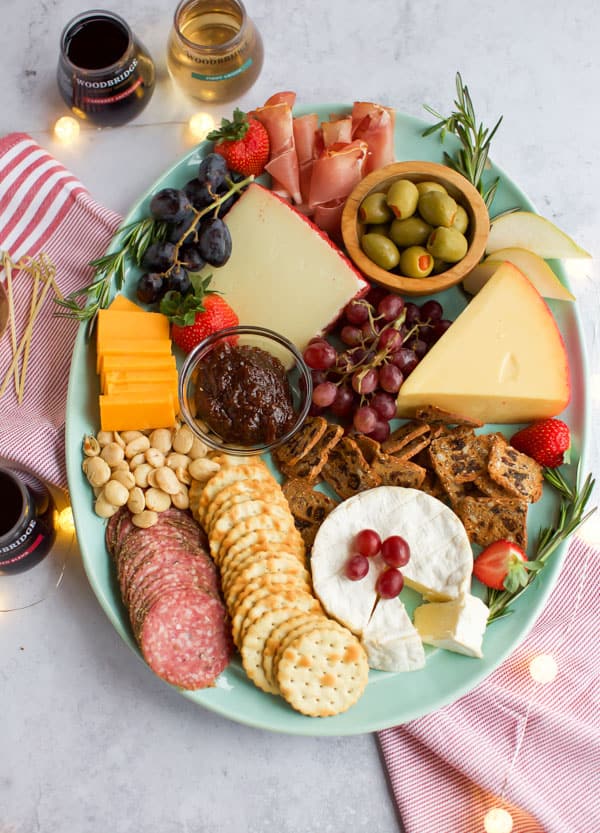
A cheese platter is an elegant and versatile cheese appetizer perfect for a quick snack, a light meal, or entertaining a large crowd. It combines different cheeses and other ingredients such as fruits, nuts, crackers, and meats - arranged on a board or platter for easy serving.
Cheese platters can often look intimidating, fancy, and too sophisticated to give them a try. But they're actually quite simple to make as long as you follow the basic order of preparation.
The beauty of cheese boards is that you can customize them to fit your lifestyle and dietary needs. And suit different tastes and preferences. So whether you're hosting a party or simply indulging in a fancy snack, a cheese platter is a great choice that's easy to prepare and sure to impress.
If you are looking to make a crudites board, this Crudites platter is so lovely!
Ingredients you will need
A good cheese board always starts with different types of cheese. But as with most food boards, use this as a guide to making your own cheese plate. That’s the best part - you can create your own perfect cheese board based on personal taste preferences and dietary restrictions. Pick and choose from these cheese board ideas:
- Cheese - Choose a variety of cheeses with different textures and flavors. Keep reading for specifics about what kind of cheese and how to pair them, so they all shine.
- Meats - This is optional on a cheese board, but charcuterie meats like salami, prosciutto, and pepperoni are always a great addition and add protein to the board.
- Crackers - It’s always a good idea to pair cheese with your favorite crackers or slices of crusty bread.
- Fruits and vegetables - Can’t forget about fresh produce like grapes, cucumbers, grape tomatoes, and even greenery like arugula or fresh rosemary sprigs; stone fruits are a welcome addition in the summer months.
- Nuts - Smaller items like walnuts, almonds, and pistachios are an easy way to fill in the empty spots and make the cheese board look cohesive.
- Dips and Jams - Fig jam, basil pesto, pepper jelly, or even a good quality extra virgin olive oil are a great addition because they add lovely texture and flavor.
- Marinated veggies - Artichoke hearts, kalamata olives or Spanish olives, Italian Giardiniera, and roasted red peppers are excellent cheese pairings.
Supplies you will need
The best thing about a good cheese platter is that you don’t need fancy cookware or supplies to pull off a beautiful cheese board. You only need a flat surface as your serving plate and a few serving tools.
Here are some optional supplies to help you make an epic cheese board:
- Serving platter - A great option is a large platter or a wooden cheese board like a bamboo cutting board. A basic baking sheet or a large dinner plate will work.
- Bowls - For jams, dips, and olives, use a variety of little bowls you already have in your kitchen.
- Cheese knives - Ideally, you want to use a separate knife for each type of cheese to prevent flavors from mixing. Butter knives work great as well.
If this is your first time making a cheese board, no need to run out to buy anything special. As much as we all love a nice touch of a fancy cheese board, use any clean or flat surface that can accommodate all your cheeses and accompaniments.
If you’re serving this for a special occasion like date nights, you may want to splurge. But keep in mind that a simple cheese platter is a great way to treat your loved ones.
What Cheeses to Use and How Much
In order to create the best cheese board, we need to have a nice selection of different cheeses. But it’s important that you remember that there’s no way for you to mess this up. This is just a basic guideline for how I build my cheese platter. Use it as an inspiration to build your own amazing cheese tray.
Choose a combination of soft and hard cheeses, flavors, and different types of milk, such as cow’s milk, goat milk, and sheep’s milk cheese. I like to start with equal amounts of soft and hard cheeses to keep textures balanced, and from there, you can read the labels to make sure you’re getting different flavors.
In an effort to not overcomplicate things, let’s split the cheese into two categories: HARD and SOFT. For a larger cheese plate, use two kinds of cheese from the hard category and two types of soft cheese. This will ensure a nice variety on your cheese plate.
Hard cheese:
These are usually aged cheeses that are rich in fat, protein, and minerals such as calcium, phosphorus, and sodium. You want to dice these up or slice them thinly before serving on the cheese platter. Read the labels to check if they are made from cow, sheep, or goat milk.
- Parmigiano-Reggiano
- Manchego
- Cheddar, Dubliner
- Pecorino Romano
- Smoked Gouda or Havarti (semi-hard cheese)
Soft cheese:
A delicious addition to any charcuterie board, softer cheeses can often be served as cheese wedges with a cheese knife. Allow your guests to serve themselves. As with hard cheeses, make sure you check the label to see what type of milk is used. Some good options for soft cheese are:
- Blue cheese like Roquefort or Gorgonzola
- Brie or Camembert cheese
- Goat cheese or Feta
- Burrata or Ricotta
How to Make a Cheese Platter
Making a cheese tray can appear intimidating because it has many different components. But once you start breaking it down, it’s neither difficult nor time-consuming. There are many different ways to build a cheese platter, so don’t overthink it.
These step-by-step instructions will help you make the best cheese platter but remember, it’s very flexible. Use this as a springboard to create your own delicious cheese plate appetizer.
Pull out all your supplies and ingredients. It helps to visually see what you are working with and also gets those creative juices flowing. Also try this Simple Charcuterie Board.
Step 1. Cheese
Start by setting out the big items on your serving platter, board, or tray (whatever you are using). This will take up the most room on the cheese plate, and the smaller foods like nuts, and fruits will cover the blank spaces.
Arrange the cheeses throughout the board. Serve cheeses in different shapes and textures to add visual interest. Serve soft cheeses like goat cheese and brie cheese as is but harder cheeses like aged cheddar or parmesan are best cut into slices or cubes.
If serving dips, jams, or olives, arrange the bowls evenly between the cheeses on the platter.
Step 2. Meats
Next up are meats or charcuterie items. You can use a mixture of soppressata, peppered salami, regular deli salami, or prosciutto here.
Like with cheese, add your meats in a few different ways for that visual appeal. Fan out salami in a line or half circle or fold larger pieces like soppressata into quarters to create wedges. Roll prosciutto or twist it as you lower it onto the board, creating folds and lovely height.
How you add the charcuterie meats will also depend on how much space you have on the cheese board. If you have a large cheese board, you have more flexibility and can fan out the meat slices in a half circle. A simple stack of salami will work if you are short on space or making a small cheese plate.
Step 3. Breads
Once we have cheeses, bowls, and charcuterie arranged on the platter, next we’ll turn our attention to breads, crackers, and chips.
Use a variety of crackers, crostini, or pita chips. You can skip this section entirely if you want to focus on healthy fats, protein, and fruits. This is especially helpful if you are on a gluten-free or grain-free diet like paleo. If you are looking for some crunch, plantain chips are a wonderful addition.
Step 4. Fruits and Nuts
Finally, we will finish off this easy cheese board with seasonal fruit and a variety of nuts to fill in those empty spaces.
Arrange the fresh fruit evenly on the cheese board. Grapes, berries, stone fruits, even dried fruit like dried apricots all work great. You can also add vegetables like grape tomatoes and sliced cucumbers (cut them on a bias for a fancy look).
Likewise, drop a few tablespoons of nuts into the small blank spaces to fill up any open spots. Walnuts, Marcona almonds, pecans, or pistachios are all wonderful choices.
Step 5. Finishing Touches
Lastly, this is where the cheese plate really comes together as we give it finishing touches.
Remember those small bowls we arranged on the board in step 1? Now is the time to fill them up with your choice of dip. Fig jam, apricot preserves, pepper jelly, honey, and veggie dip are all great options that offer different flavors.
Alternatively, you can also add various olives like kalamata olives or Castelvetrano green olives to these bowls. Or marinated artichoke hearts or pickled veggies for a lovely variety of flavors.
If you have some fresh herbs like sprigs of rosemary or thyme, tuck them in between cheeses and charcuterie for a visual contrast.
Add cheese knives, spoons, or honey dipper sticks if needed. Your cheese platter is now ready to serve!
Seasonal Variations
The best part about cheese boards is that they can work for you any time of the year because it’s so easy to include fresh seasonal produce. Check out these in-season combinations:
- Spring: radishes, pickled asparagus, fresh berries like strawberries, blueberries, and raspberries
- Summer: cherry or grape tomatoes, bruschetta, sliced Persian cucumbers, stone fruits like sliced peaches or halved apricots, fresh figs, fresh cherries
- Fall: apple or pear slices (drizzle with a little bit of lemon juice to prevent browning), grapes, rosemary garnish, persimmons
- Winter: citrus fruits like blood oranges or mandarins, kumquats, pomegranate, grapes, kiwi slices, and rosemary sprigs for garnish
Helpful Tips
Making a cheese platter doesn’t have to be difficult. Here are some of my best tips to help you make the best cheese platter for your guests.
- Serve cheese at room temperature. For best results, pull out the cheese about 30 minutes before serving. You can cut it into desired pieces when it’s chilled and cover with plastic wrap so it doesn’t dry out.
- Wash and dry fruit and veggies. Wash your grapes, berries, and veggies ahead of time and spread them out on a clean kitchen towel to dry out well. Moisture on cheese or charcuterie will change the flavor and texture.
- Add greenery: Fill in any empty spaces on your finished cheese board with something green like arugula leaves, fresh herbs like parsley or rosemary leaves. This will break up the color since most cheese plates tend to lean very tan.
Cheese Platter on a Budget
Cheese can get expensive very fast. Thankfully, you can still pull off a wonderful cheese board on a budget with items from your local grocery stores. See this Tasting Table article on the Best Cheeses to Buy on a Budget.
Here are some budget-friendly tips to keep in mind next time you make your cheese platter:
- Skip the fancy cheese and go with simple but delicious. Aged cheddar, havarti, or dubliner are all easier on the wallet. Cream cheese is a great alternative to softer fancy cheeses.
- Rethink charcuterie. Nex to the cheese, meats are undoubtedly the most expensive part of a cheese plate. Feel free to omit this entirely or use regular sliced turkey or ham and cut into wedges or roll them up for a fun visual appeal.
- Use cheap crackers. They’re not the star of the show anyways, and most of the time, they are just a filler on the board.
- Get the black olives. These tasty morsels still offer great flavor and variety without breaking the bank.
- Shop seasonally. It’s always cheaper to buy produce in season. And they taste fresher and better anyways.
Frequently Asked Questions
What is charcuterie?
Charcuterie is a French term that refers to preserving meat products such as ham, bacon, sausages and other cured meats. The process typically involves salting, curing, smoking, or fermenting the meat often with spices or other flavorings to enhance flavor or extend shelf life. You can enjoy charcuterie meats such as salami, prosciutto, and soppressata on their own as a snack or use them as ingredients in a variety of dishes. They are also a great choice for cheese platters.
What should go on a cheese platter?
A cheese platter is a serving tray that features different varieties of cheese, charcuterie, fruits, nuts, and dips. A good rule of thumb when making a cheese platter is to use a combination of various ingredients for interesting flavors and textures.
How do you make a cheese platter on a budget?
Use budget-friendly ingredients for your cheese platter. Use 2-3 inexpensive cheeses like mild cheddar and havarti. Slice up a baguette instead of fancy crackers, fan out apple slices instead of fresh berries and set a small bowl of black olives. Arrange this on a bed of mixed greens to elevate the look and add some greenery. A cheese platter doesn’t have to be expensive to be enjoyed.
Serving Suggestions
For date nights or other special occasions, a cheese platter can be paired with Pomegranate Orange Sangria or Easy Pomegranate Mojito. It’s a fantastic appetizer before a full meal featuring Baked Pork Tenderloin or Gluten Free Salmon Piccata.
You can also serve a cheese platter as a light meal because it’s packed with healthy fats and proteins. There’s no right or wrong way to enjoy a cheese platter.
Need More Healthy and Simple Appetizers for Entertaining?
- Baked Brie with Cranberry Sauce
- Crostini with Scallops and Avocado
- Arugula and Prosciutto Pizza
- Baked Brie with Cranberry Raspberry Sauce
- Prosciutto Wrapped Pears with Manchego
Cheese Platter
Ingredients
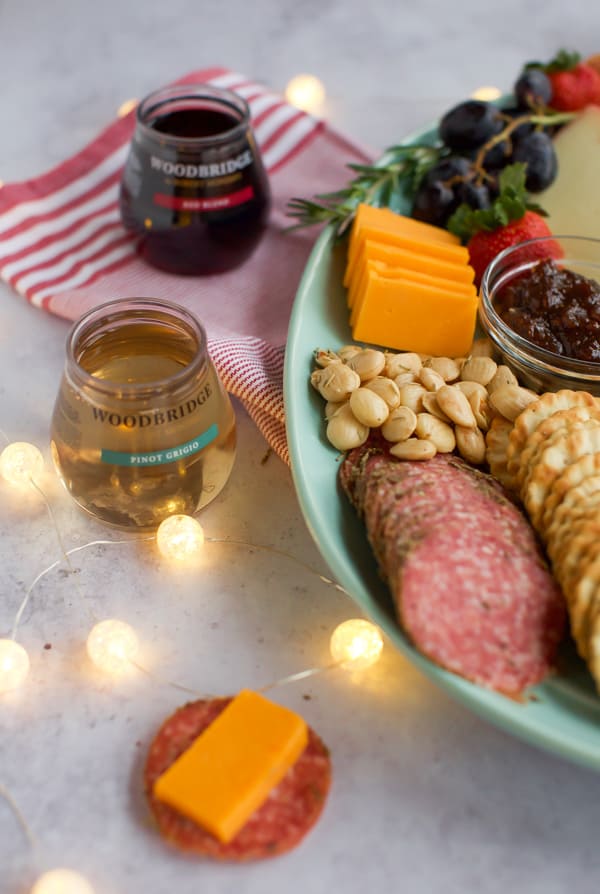
- 4 different kinds of cheese
- peppered salami and prosciutto
- crackers
- olives
- nuts (Marcona almonds with thyme!)
- sliced fruit
- fig jam
Instructions
- Arrange everything on a large platter. Slice some of the cheese into bite sized pieces.

Tania | Fit Foodie Nutter says
This festive platter looks so stunning! I wish I could sit at your table and help you devour this gorgeous spread!
Kelly Anthony says
Absolutely beautiful and the perfect balance of sweet and salty make this the perfect cheese platter!
Jeannette (Jay Joy) says
I am the least fancy person I know. However, I have grown to LOVE this family I met from New Zealand who introduced me to cheese platters. They are amazing! This looks great.
Emily says
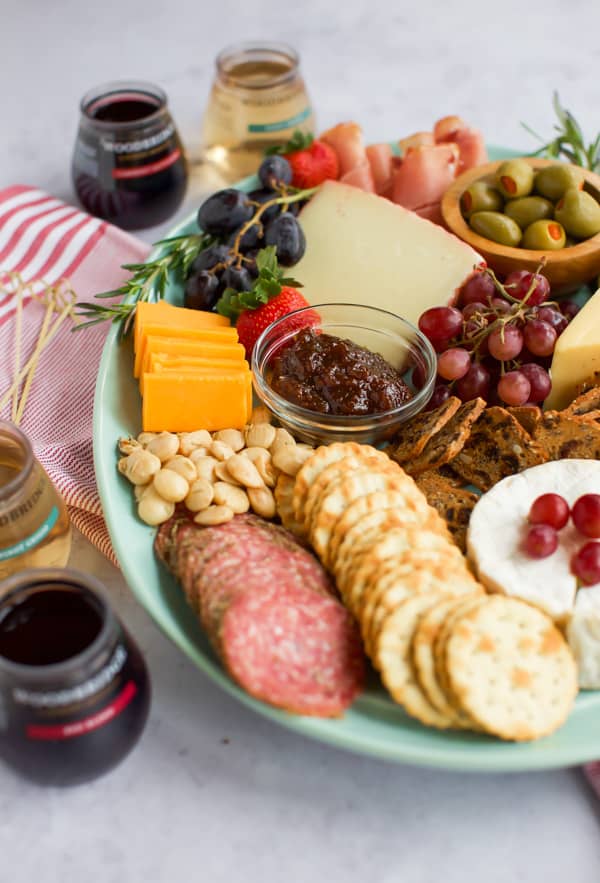
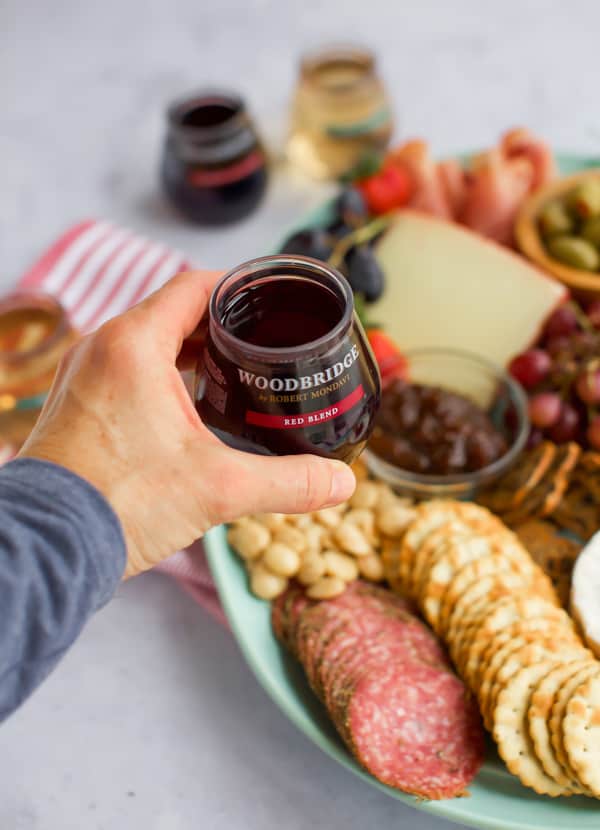
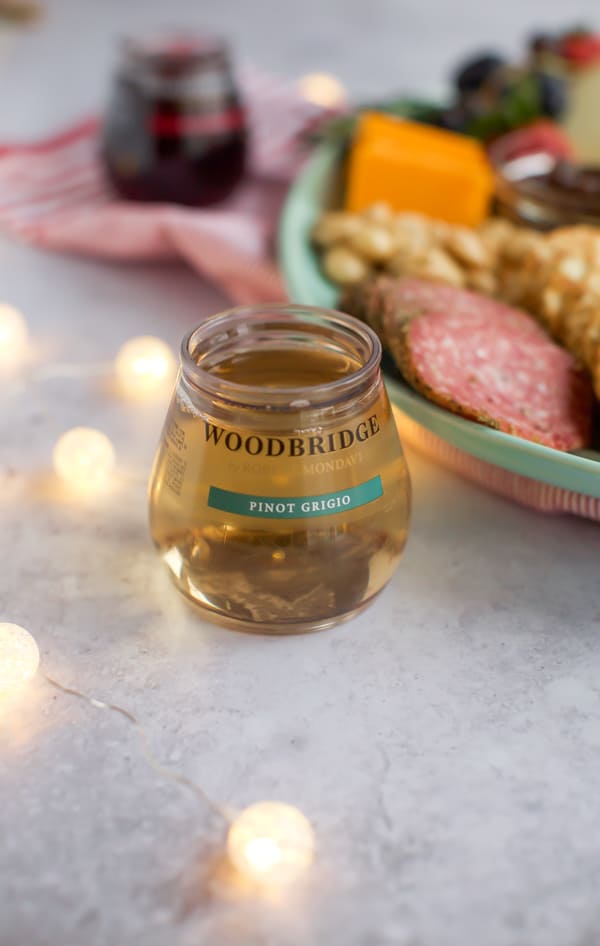
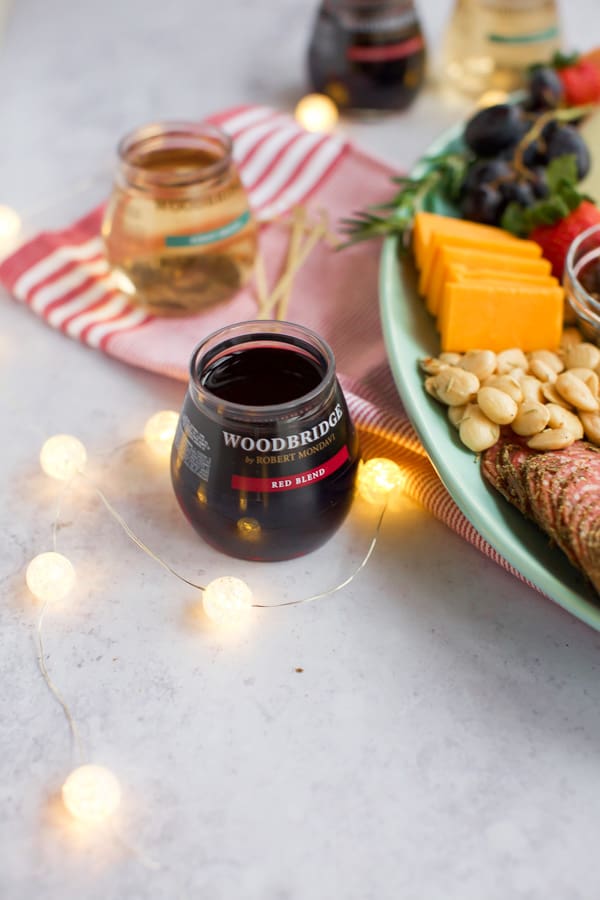
This platter looks great, and I love Woodbridge wine. They really go really well together.
Sherri says
The hardest part about making a cheese platter for me would be not eating all the cheese before the guests arrive! 😉 This platter is stunning! A perfect combination of ingredients with something for everyone! I love those single serve wines too! I've had them at events, but never thought of serving them at parties. Such a great option! Hope you have a great holiday season! 🙂
Laura | Wandercooks says
Yum this looks so mouthwatering and I love those cute little wine cups - these will definitely come in handy on our next hiking picnic. 👌🏼
Kavita Favelle says
I'm a sucker for a great cheese board. I love the addition of charcuterie and nuts, to make it even more decadent!
Natalie says
Absolutely beautiful! Very nice photos. Definitely gonna make this the cheese platter for Christmas!
Janice says
What fun way to entertain, I do love a cheese platter and a glass of wine is the perfect accompaniment.
Camilla Hawkins says
I am drooling over your cheese platter right now. I've never though to add any except cheese and grapes but will try this next time I need to make one!